Email marketing is a highly effective way to reach your target audience and promote your business. However, it’s important to ensure that your email subscribers have the option to opt-out of receiving your emails. This is where an unsubscribe link comes in handy. In this article, we’ll discuss how to add an unsubscribe link in Pardot email, one of the most popular email marketing tools.
Step 1: Create an Unsubscribe Landing Page
The first step is to create an unsubscribe landing page on your website. This page should include a message confirming that the user has been unsubscribed, and may also include an option to re-subscribe.

Step 2: Add the Unsubscribe Link to Your Email Template
Now it’s time to add the unsubscribe link to your email template. To do this, open your email template in Pardot and place your cursor where you want the unsubscribe link to appear.

Step 3: Then, click the “Insert Merge Field” button
With your email template open in Pardot, locate the “Insert Merge Field” button, which is typically found in the toolbar at the top of the email editor. This button allows you to insert dynamic content, such as personalization fields or, in this case, the unsubscribe link, into your email template. Click the button to open a list of merge field categories that you can choose from to insert the appropriate field into your email.
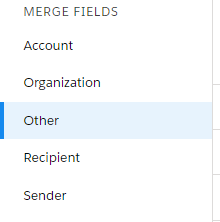
Step 4: From the merge fields options select “Other”
After clicking the “Insert Merge Field” button, a list of merge field categories will appear. Locate and click on the “Other” category to view additional fields that are not part of the standard options. This will give you access to the unsubscribe field that you need to add to your email template.
Step 5: In the field marked “Select Merge Field to Insert” enter “unsubscribe”
Once you have selected the “Other” category, you will see a field where you can enter or search for the specific merge field you want to insert. Type “unsubscribe” in the search field, and the option for the unsubscribe merge field should appear in the dropdown list. Click on it to select it for insertion into your email template.

Step 6: Check the “Unsubscribe” box
After selecting the unsubscribe merge field, you will notice a checkbox next to it. Make sure to check this box in order to activate the unsubscribe functionality for the link in your email. This will ensure that when a recipient clicks on the link, they are correctly unsubscribed from your email list, and the link directs them to your previously created unsubscribe landing page.

Step 7: Click on the blue “Insert” button to add your unsubscribe link to the email

Before sending out your email, it’s important to test the unsubscribe link to ensure that it’s working correctly. To do this, simply send a test email to yourself and click on the unsubscribe link. This should take you to your unsubscribe landing page, where you can confirm that you have been unsubscribed.
Step 5: Send Your Email
Once you’ve confirmed that the unsubscribe link is working correctly, you can go ahead and send your email to your subscribers. It’s important to note that including an unsubscribe link is not only a best practice, but it’s also required by law. The CAN-SPAM Act requires that all commercial emails include an easy and clear way for recipients to unsubscribe.
In conclusion, providing an unsubscribe link in your Pardot email is an essential step in maintaining a successful email marketing campaign. Not only does it promote a positive user experience by allowing subscribers to opt-out of receiving further communications, but it also ensures compliance with legal requirements, such as the CAN-SPAM Act. By following the steps outlined above, you can easily create an unsubscribe landing page, insert the unsubscribe link into your email template, and test its functionality. Ensuring a seamless and user-friendly unsubscribe process helps build trust and credibility with your subscribers, ultimately contributing to your overall email marketing success.