Marketing automation platforms like Pardot are essential tools for streamlining efforts and improving lead generation. As a powerful Salesforce-owned platform, Pardot offers numerous features to help marketers efficiently nurture leads, personalize campaigns, and monitor ROI. To maximize Pardot’s potential, it’s crucial to foster seamless team collaboration by adding users to your account.
In this concise guide, we’ll walk you through the process of adding a user to Pardot, outlining the necessary steps and permissions for a smooth onboarding experience. Whether you’re a Pardot veteran or newcomer, this article will equip you with the knowledge to expand your team’s access and enhance your marketing automation capabilities. Let’s dive in and boost collaboration with Pardot!
Accessing Pardot Settings
To add a new user to Pardot first select Pardot Settings from the top menu.

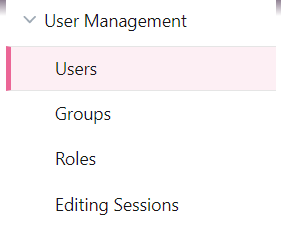
Navigating to User Management
From the side menu under User Management choose Users.
Creating a New User
Click on the blue + Add User button.

Entering User Details
Enter the details of the new user. For every new user you will need to enter their First Name, Last Name and Email Address. You can also choose to enter their Job Title, Phone Number and the URL of any website that is associated with them.

Setting up Email Signature
Pardot enables you to enter an email signature for that particular user. This is useful because you will then be able to use a merge field to enter that signature on any email that is sent via Pardot from that user. You can create both an HTML Email Signature as well as a plain text version of their signature.

Integrating with Salesforce
You will also want to integrate the Pardot user with their Salesforce user account. To do this find their CRM Username on the drop down menu.

Assigning Pardot Role
Now decide which Pardot role you wish to have attributed to this user.

Setting Security Limits
You can also choose to have certain security limits placed on the Pardot user. This includes the number of emails that the user can send or how many prospects that can either export or import.

Configuring User Preferences
Preferences is where you can choose different types of notifications for that user. There are a number of different options for the types of notifications a user can receive. This includes receiving a daily report of activities of their prospects.

Finalizing User Creation
When you have finished the settings for this particular user, click on the blue Create user to add the user to Pardot.

Adding a user to Pardot is essential for effective team collaboration and optimizing marketing automation efforts. By following this guide, you can onboard new Pardot users, assign roles, and configure preferences. Embrace Pardot’s features and elevate your marketing strategy with a well-connected team.