Customizing your Pardot email preferences page is an essential aspect of optimizing your marketing automation efforts. In this comprehensive guide, we’ll walk you through the step-by-step process of tailoring the Pardot email preferences page to better suit your subscribers’ needs and enhance their overall experience. By adapting the layout, content, and settings, you’ll create a more engaging and user-friendly platform that encourages subscription management and promotes brand loyalty.
Accessing Pardot Email
To customize your email preferences page start by clicking on Pardot Email in the top menu.

Selecting Preferences Page
From the side menu select Preferences Page.

Editing Preference Pages
You will now be able to see a list of the preference pages that you have previously created. Click on the cog icon next to the right of the preference page you want to edit. From the drop down menu select Edit.

Renaming and Retitling
You can choose to rename the preference page or to give it a different title.

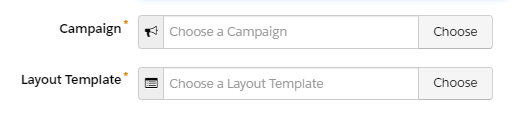
Adjusting Campaigns and Layouts
Next you can adjust which campaign the email preferences page is connected to. Below this is the option to choose a different layout template for your landing page. This option gives you a lot of flexibility about the look of your preferences page.
Creating New Layouts
If you wish to create a new layout, for your preference page select Content from the top menu.

Navigating to Layout Templates
From the side menu select Layout Templates.

Adding a Layout Template
Now click on the blue + Add Layout Template button.

Customizing Layout Template Settings
Choose the settings for your layout template including the name, folder and tags associated with the layout. Once you have completed these details, you can adjust the appearance of your layout template. When you have finished editing your layout template, save the layout, and return to your email preferences page.

Implementing Vanity URLs
The next field for your layout template is the option to include a vanity URL. This enables you to provide a simpler and easier to remember URL for your preferences page.

Associating Pardot Lists
Choose any Pardot lists that you want to associate with your email preferences page. These are the lists that prospects will be able to subscribe or unsubscribe to via your preferences page.

Inserting Content Above Lists
Add in the content that you want to appear above the lists. This is typically a description of what actions a prospect can take on the page.

Customizing Subscription Wording
You can choose the wording next to the subscribe link and for the confirmation after the prospect has unsubscribed.

Crafting Thank You Content
After the prospect has adjusted their email preference, you can present them with Thank You content. In addition to confirming that their preferences have been saved, you can use this page to point the prospect towards other content or resources that may be of interest to them.

Editing Subscription Status Messages
You can also edit the message showing which lists the prospect is now subscribed to and which they have opted out of.

In conclusion, taking the time to customize your Pardot email preferences page is a valuable investment in your marketing strategy. By following the steps outlined in this guide, you can create a tailored and engaging platform that not only allows your subscribers to manage their preferences with ease, but also reflects your brand’s unique identity. Remember, a well-designed email preferences page can greatly improve subscriber satisfaction and contribute to the success of your email campaigns.