Merge fields are a powerful feature that allow you to insert dynamic content into your emails. This means that you can personalize your emails to each individual lead, without having to spend hours creating a unique email for each recipient.
In this article, we’ll show you how to use merge fields in a Pardot email template, step by step. Whether you’re new to Pardot or just need a refresher, we’ve got you covered.
Choose your email template
Before you can add merge fields to your email, you need to choose a template to work with. Pardot provides a variety of pre-designed email templates that you can use as a starting point, or you can create your own from scratch.
To choose a template, navigate to the Email Template tab in Pardot and click on “Account Engagement Email” from the top menu and then select “Email Templates” from the side menu. From there, you can select a pre-designed template or choose to start from a blank template.

Add a merge field
Once you have your email template open, you can begin adding merge fields. To add a merge field, click on the drop down next to “Insert Merge Field”

A dropdown menu will appear, showing all the available merge fields that you can use in your email. These merge fields are organized by category, making it easy to find the one you need.
For example, if you want to include the recipient’s first name in your email, you can select
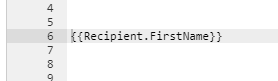
“Recipient’s First Name” from the “Recipients” category. This will insert the merge field into your email template, surrounded by double curly braces, like this: {{Recipient.First Name}}.
Preview your merge field
Before you send your email, it’s a good idea to preview it to make sure that your merge fields are working correctly. To do this, you can use Pardot’s preview function.
In the email editor, click on the “Preview” button in the toolbar. This will open a preview of your email in a new tab, with sample data filled in for each merge field. Choose the “Preview as a Prospect” option to see the merge fields filled in.
Check to make sure that each merge field is displaying the correct information. If something looks off, you may need to adjust the merge field or your data.

Test your email
Once you’ve previewed your email and are happy with how your merge fields are working, it’s time to send a test email. This will allow you to see how your email looks in a real email client and make sure that everything is working as expected.
To send a test email, click on the “Testing” button. Send the email template to your test list to verify the merge field is working correctly in an email client.

In conclusion, merge fields are a powerful tool that can help you create personalized and effective email campaigns in Pardot. By using merge fields to insert dynamic content into your emails, you can save time, increase engagement, and ultimately drive more conversions.
Whether you’re just getting started with Pardot or you’re a seasoned pro, using merge fields can take your email campaigns to the next level. So the next time you’re creating an email in Pardot, don’t forget to leverage the power of merge fields to create a personalized experience for your leads.